


Leaderboard


Popular Content
Showing content with the highest reputation on 04/16/18 in Posts
-
8 points
-
👑CzarScripts #1 Bots 👑 👑 LATEST BOTS 👑 If you want a trial - just post below with the script name, you can choose multiple too. 👑 Requirements 👑 Hit 'like' 👍 on this thread6 points
-
6 points
-
4 pointsWe're waiting on ProjectPact to both actually upload the script, and correctly package his script so it can actually compile on the SDN.4 points
-
3 pointsI have a guide relating to configs & widgets if you would like to take a look at it3 points
-
2 pointsSo i just got 98 fletching today! I botted 1-98 using perfect fletcher. Haven't really been suiciding it, longest i did was maybe 7 hrs in a day. This is gonna be my second 99 completely botted on the account (if i dont get banned right before 99 lul). Also going for a third 99 as we speak too but im gonna keep that one a secret till im closer. (its only 83 outta 99 atm for other skill). Kinda feel like im getting lucky or is fletching still that easy to bot to 99? o well wish me luck and hopefully i can keep getting more 99s or give up after a decent amount and sell or actually play the account2 points
-
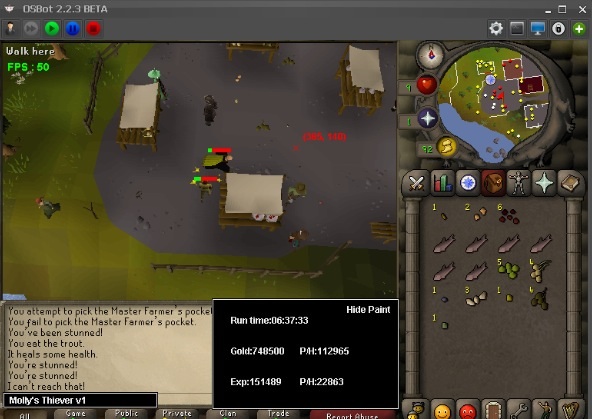
2 points2 pointsOmfg I forgot the Try delet this. ima kill myself Sorry everyone. AND I DIDNT EVEN IMPORT import javax.imageio.ImageIO; import java.io.IOException; import java.awt.image.BufferedImage; Learn from my pain children of the future2 points2 points" My girlfriend and I have been together for almost 3 years and she means the absolute world to me " Give it a few more years ^^ Anyway. Good luck on your adventure man! May the banhammer miss you!2 points2 pointsPlease make sure to select all needed settings. If the GUI turns up weird, first minimize it once.2 points2 pointsDid you possibly forget to call onStart on your RestlessGhost instance? It wont be called automatically. Also be mindful with initializing it before your Scripts onStart, as accessing hooks before onStart is called will cause errors. If you share the exact error trace tho, we can help point out exactly where the problem is Nothing wrong with extending MethodProvider; just remember to exchange contexts.2 points2 points1 point────────────── PREMIUM SUITE ────────────── ─────────────── FREE / VIP+ ─────────────── ──────────────────────────────────────────────────────────── ⌠ Sand crabs - $4,99 | Rooftop Agility - $5,99 | AIO Smither - $4,99 | AIO Cooker - $3,99 | Unicow Killer - £3,99 | Chest Thiever - £2,99 | Rock crabs - $4,99 | Rune Sudoku - $9,99 ⌡ ⌠ AIO Herblore - FREE & OPEN-SOURCE | Auto Alcher - FREE | Den Cooker - FREE | Gilded Altar - FREE | AIO Miner - VIP+ ⌡ ──────────────────────────────────── What is a trial? A trial is a chance for you to give any of my scripts a test run. After following the instructions below, you will receive unrestricted access to the respective script for 24 hours starting when the trial is assigned. Your trial request will be processed when I log in. The trial lasts for 24 hours to cater for time zones, such that no matter when I start the trial, you should still get a chance to use the script. Rules: Only 1 trial per user per script. How to get a trial: 'Like' this thread AND the corresponding script thread using the button at the bottom right of the original post. Reply to this thread with the name of the script you would like a trial for. Your request will be processed as soon as I log in. If i'm taking a while, i'm probably asleep! Check back in the morning Once I process your request, you will have the script in your collection (just like any other SDN script) for 24 hours. Private scripts: Unfortunately I do not currently offer private scripts. ________________________________________ Thanks in advance and enjoy your trial! -Apaec.1 point1 pointThis is an AIO (All-in-one) bot that has almost every thieving style except blackjack, ask for a free trial by liking thread or making a post! Vyres and elves are now supported! Both can make solid profit per hour, decent passive income! BIG THANK YOU TO ALL OUR SUPPORTERS! WE ARE THE MOST SOLD THIEVING BOT IN OSBOT HISTORY. MOST REPLIES, MOST USERS, LONGEST PROGGIES #1 Thiever | Most Overall Sales | Most Total Replies | Most Results | 10+ Years Maintained | 'the intelligent choice' by Czar SUPPORTS VYRES 224M made in a single sitting of 77 hours 1.1B made from elves and vyres!! ELVES SUPPORTED TOO! (NEW) 2.1m/hr, 6 crystals in 7 hrs 99 THIEVING MANY MANY TIMES, 35M EXP IN ONE BOTTING RUN!! 99 thieving in ~43k xp (12 minutes remaining)! Just got 99 proggy! Gratz to @iz0n THIEVING PET AT LVL 22 FROM TEA STALLS 11.5 HOURS, WITH PET TOO!! 610k/hr getting 99s on deadman worlds!1 point1 pointResults Instructions There are no instructions. We do the all the work for you. CzarScripting™ Tips Make sure to set food in your setup window! Don't bot more than 12 hours a day! It's not humanlike! Features - All locations supported, including Crab Claw Isle - Banking support - All combat types supported (ranged, all ammo + ranging types, including looting) - Activity Slider -- choose 4 different activity settings from: (Afk my position, Afk any generated position, Attack visible/active crabs only, Full activity/attack all) - Aggression Slider -- choose from 4 different aggression settings: (Only retaliate to crabs, Attack people's crabs when none are found, Attack all crabs, ONLY attack other people's crabs) - Tasked levelling - allows you to set level goals and switch attack styles to raise different skills, e.g. set goals to 50 70 70, from current stats 44 51 55, it will reach the goal stats. - Skill Priority: you can choose in which order to raise the stats, e.g. lowest first, nearest to goal first, top->bottom, bottom->top, level-up evenly, etc. - Customized Stop Conditions: stop script when a certain condition is met, e.g. reached goal stats, killed X crabs, time passed, ran out of equipment, items, etc. - Simple (on user's side) inventory layout chooser consistent with all my scripts -> 1 button copies inventory layout and saves it - World hop support, with player count chooser -- World hop customization: allows you to choose which tile to hop worlds from -- Break tile chooser: allows you to choose which tile to break on, ~3 minutes before breaks trigger - 'Non-botting' mode (very popular): allows you to afk the script and technically not bot at all: the script will display jframe popups (and beep) when crabs are no longer aggressive which will prompt the user to manually refresh the crabs by walking up - Item looting, including rare drop table option - Potion support (all potion types) - Crab refreshing by walking out of the region Gallery1 point1 point'the intelligent choice' by Czar Want to buy the bot, but only have rs gp? Buy an OSBot voucher here1 point1 pointMolly's Thiever This script is designed to quickly and efficiently level your thieving! Check out the features below. Buy HERE Features: - Capable of 200k+ per hour and 30k+ exp/ph on mid-level thieving accounts. - Quickly reaches 38 thieving to get started on those master farmers for ranarr and snap seeds! - Fixes itself if stuck. - Hopping from bot-worlds. - Stun handling so the bot doesn't just continually spam click the npc. - Drops bad seeds if inventory is full at master farmers. - Eats any food at the hp of your choosing. Supports: -Lumbridge men -Varrock tea -Ardougne cake -Ardougne silk -Ardougne fur -Kourend Fruit Stalls -Ardougne/Draynor master farmer -Ardougne/Varrock/Falador guards -Ardougne knight -Ardougne paladin -Ardougne hero -Blackjacking bandits as well as Menaphite thugs, this has limitations, click the spoiler below to see them Setup: Select your option from the drop down menu, it will tell you the location where the target is located. Fill out the gui and hit start. Simple setup! Proggies: Proggy from an acc started at 38 theiving:
 1 point1 pointSebastian's GUI Tutorial Intro Hi, and welcome to my guide on how to make a GUI. I want to make this thread because i couldn't find a tutorial on GUI's on the OSBot forums. Today we are going to make a GUI for a woodcutting script. Keep in mind that i only use woodcutting as an example. You can easily replace woodcutting with every other thing. In this tutorial we will use Java Swing. This tutorial is "noob" friendly but i assume that you know a little bit about Osbot scripting. If you don't, please follow Apae's tutorial on how to make your first script We are creating a GUI with comboBox and a start button. NOTE: English is not my first language so bear with me if i use any spelling mistakes in this tutorial. General information GUI stands for "Graphical User Interface". This is a box that will appear when you start your script. The user of your script can apply settings for your bot. What do we need? Basic Java knowledge Eclipse or IntelliJ Step 1: Creating the classes The first thing we need to do is creating the classes. I decided to make 2 classes: main gui First we create the gui class. public class gui { public void run() { // Enter new code } } Now we want to connect the gui class with the main class. We can do that by typing "main main" into the public void run(). Example: public class gui { public void run(main main) { // Enter new code } } To tell that the gui exists we need to write some code in the main class: private gui gui = new gui(); Now the gui class is connected with the main class. We will come back to this later on in this tutorial. To run the gui class on start we need to add "gui.run(this);" into our onStart() method in the main class. Example: public void onStart() { log("Starting script.."); gui.run(this); } Alright. We are done with creating the classes. Let's continue to the next step! Step 2: Creating the jFrame If you start your script now, nothing will appear. That's because we didn't make the GUI yet. We've only created the files to work with. So, the first thing we need to do is creating the jFrame. Switch back to your gui class and paste the following into the "Public void run(main main)": JFrame jFrame = new JFrame("OSBOT Tutorial GUI"); Cool! We've created our first jFrame! But.. We're not done yet. If you start your script now nothing will appear. That's because we haven't set the size and we didn't make it visible yet. That's what we're going to do now. So, under the "JFrame jFrame = new JFrame("OSBOT Tutorial GUI");" we need to paste the following: jFrame.setSize(300, 500); jFrame.setResizable(false); Alright, so now we've added the size and we've set the setResizable to false because we don't want users to resize the gui. The gui is still not visible yet but we're getting somewhere. Let's move on to the next step. Step 3: Creating a JPanel To make the gui a bit more beautiful we are going to add a panel. We will call this panel the "settings" panel. Inside this panel all our settings will be displayed. Paste the following code into the gui run void: JPanel settingsPanel = new JPanel(); TitledBorder leftBorder = BorderFactory.createTitledBorder("Settings"); leftBorder.setTitleJustification(TitledBorder.LEFT); settingsPanel.setBorder(leftBorder); settingsPanel.setLayout(null); settingsPanel.setBounds(5, 200, 280, 180); jFrame.add(settingsPanel); This will add a panel to our jFrame. This seems like a lot of code so let me break it down to you. JPanel settingsPanel = new JPanel(); This will create the settingsPanel. TitledBorder leftBorder = BorderFactory.createTitledBorder("Settings"); This creates a titled border with the word "Settings" in it. jFrame.add(settingsPanel); This will add the settingsPanel to our jFrame. Alright, your code should look like this: public class gui { public void run(main main) { JFrame jFrame = new JFrame("OSBOT GUI Tutorial"); jFrame.setSize(300, 500); jFrame.setResizable(false); JPanel settingsPanel = new JPanel(); TitledBorder leftBorder = BorderFactory.createTitledBorder("Settings"); leftBorder.setTitleJustification(TitledBorder.LEFT); settingsPanel.setBorder(leftBorder); settingsPanel.setLayout(null); settingsPanel.setBounds(5, 200, 280, 180); jFrame.add(settingsPanel); } } We also need to create a start panel. This is only to make the gui a bit more beautiful. JPanel startPanel = new JPanel(); startPanel.setLayout(null); startPanel.setBounds(5, 350, 70, 20); jFrame.add(startPanel); Now it's time to get to the next step; adding the comboBox. Step 3: Adding the label & combobox First, we need to create a label. A label can be made like this: JLabel treeSelection = new JLabel("Select a Tree:"); Second, we need to set some bounds and we need to add the Label to our settingsPanel. treeSelection.setBounds(10, 40, 95, 20); settingsPanel.add(treeSelection); Alright. We've added our first label into our settingsPanel! Now we need to create the comboBox: JComboBox<String> treeList = new JComboBox<String>(new String[] { "None", "Tree", "Oak", "Willow", "Yew", "Magic tree"}); Next, open your main class and create a public string called tree: public String tree = ""; Once you've done that you need to go back to your gui class. To check what tree you have selected we need to add an eventlistener: treeList.addActionListener(e -> main.tree = (String) treeList.getSelectedItem()); This will set the public String tree in your main class to the selected tree. For example: If i selected Oak, the script will make the public String tree like this: public String tree = "Oak"; So now the script knows what tree you'd like to chop :). Alright, next thing we need to do is setting the bounds and add it to our settingsPanel. treeList.setBounds(160, 40, 110, 20); settingsPanel.add(treeList); Ok. So far we've created a jFrame, added the settings & start panel, added a Label and added a working comboBox. Your gui class should look like this: public class gui { public void run(main main) { JFrame jFrame = new JFrame("OSBOT GUI Tutorial"); jFrame.setSize(300, 500); jFrame.setResizable(false); JPanel settingsPanel = new JPanel(); TitledBorder leftBorder = BorderFactory.createTitledBorder("Settings"); leftBorder.setTitleJustification(TitledBorder.LEFT); settingsPanel.setBorder(leftBorder); settingsPanel.setLayout(null); settingsPanel.setBounds(5, 200, 280, 180); jFrame.add(settingsPanel); JPanel startPanel = new JPanel(); startPanel.setLayout(null); startPanel.setBounds(5, 350, 70, 20); jFrame.add(startPanel); JLabel treeSelection = new JLabel("Select a Tree:"); treeSelection.setBounds(10, 40, 95, 20); settingsPanel.add(treeSelection); JComboBox<String> treeList = new JComboBox<String>(new String[] { "None", "Tree", "Oak", "Willow", "Yew", "Magic tree"}); treeList.addActionListener(e -> main.tree = (String) treeList.getSelectedItem()); treeList.setBounds(160, 40, 110, 20); settingsPanel.add(treeList); } } Step 4: Adding the start button We're almost done! The only thing we still need to do is: Adding the start button Making the start button work with an actionlistener First, in our main class we need to add a lock. This will prevent the script from starting when the gui is still open. Go to your main class and insert the following code: Object lock = new Object(); Because we call the gui class on start, this will lock the script from running. Next we need to create a button: JButton startButton = new JButton("Start"); Second, create an actionlistener so when the button is pressed, the script will start. startButton.addActionListener(e -> { synchronized (main.lock) { main.lock.notify(); } jFrame.setVisible(false); }); This will unlock the script and the jFrame will dissapear. In other words: your script will start. Third, we need to add some bounds and make the button visible: startButton.setBounds(5, 390, 70, 20); startPanel.add(startButton); And last but not least, set the jFrame to visible otherwise you won't see anything when you start your script. jFrame.setVisible(true); Alright! We are done! Go export your script and check it out. The gui should look like this: Whole GUI Class: public class gui { public void run(main main) { JFrame jFrame = new JFrame("OSBOT GUI Tutorial"); jFrame.setSize(300, 500); jFrame.setResizable(false); JPanel settingsPanel = new JPanel(); TitledBorder leftBorder = BorderFactory.createTitledBorder("Settings"); leftBorder.setTitleJustification(TitledBorder.LEFT); settingsPanel.setBorder(leftBorder); settingsPanel.setLayout(null); settingsPanel.setBounds(5, 200, 280, 180); jFrame.add(settingsPanel); JPanel startPanel = new JPanel(); startPanel.setLayout(null); startPanel.setBounds(5, 350, 70, 20); jFrame.add(startPanel); JLabel treeSelection = new JLabel("Select a Tree:"); treeSelection.setBounds(10, 40, 95, 20); settingsPanel.add(treeSelection); JComboBox<String> treeList = new JComboBox<String>(new String[] { "None", "Tree", "Oak", "Willow", "Yew", "Magic tree"}); treeList.addActionListener(e -> main.tree = (String) treeList.getSelectedItem()); treeList.setBounds(160, 40, 110, 20); settingsPanel.add(treeList); JButton startButton = new JButton("Start"); startButton.addActionListener(e -> { synchronized (main.lock) { main.lock.notify(); } jFrame.setVisible(false); }); startButton.setBounds(5, 390, 70, 20); startPanel.add(startButton); jFrame.setVisible(true); } } The end of this tutorial I hope you liked my tutorial on how to make a simple GUI for your script. Go play around with it and become better with Java Swing. If you have any questions please ask.1 point1 pointHaven't been active in a while but wanted to get back scripting/farming and I found an old file with ~5000 accounts. no way I was going to check them manually so I wrote a script that checks each account for its status. Currently only supports: Account disabled Account locked Account active (logs in) Invalid login details If you get any other login error the script will most likely crash, however I don't know of any other errors that happen regularly. If you have any suggestions let me know I'll add them in. How to use Create a file called "accounts.txt' in your OSBot/Data folder. This file holds all of your accounts. WARNING: If you want to keep a list of all your accounts together make sure to back it up because the accounts will be deleted from "accounts.txt" along the way! The file should be the following format: user:pass user:pass user:pass user:pass user:pass Now you can run the script. You have to run the script with CLI, because norandoms is required. java -jar "path/to/OSBot.jar" -login user:pass -bot x:y:0000 -world 83 -script NaaizBanChecker:0 -allow norandoms The script will cycle through all accounts divide them into 4 groups: Active Banned Invalid Locked The accounts will be placed in their respective text files in the OSBot/Data folder. You do NOT need to create these files beforehand. Script will stop when the "accounts.txt" file has no more accounts in it. There is a known bug which causes the script to skip out on the last account in the file, which is being worked on. If you run into any problems let me know and I'll fix them asap. Download: Here Changelog: v1.00 15/4/2018 - Initial release v1.01 15/4/2018 - You can now have colons in your password. v1.02 15/4/2018 - Script now waits 5 minutes if it gets the error of too many login attempts. v1.03 some bugfixes1 point1 point1 point1 pointReaches 99 fletching 2 hours later, "Your account has been disabled. Please check your message-centre for details".1 point1 point1 point1 point1 pointbuying 120m $0,79/m PayPal skype:maz_woj discord:tranzystor3#92641 point1 pointhttps://osbot.org/api/org/osbot/rs07/api/model/Character.html1 point1 point1 pointAs a man who absolutely sucks at organizing his banks I think this script will be a godsent1 pointCan confirm I am OO through PM's. Do however feel free to use me as an MM / extra verification on moment of trade so I can re-verify. Good luck on the sale !1 point1 point1 point1 point@RagBoys III Looks like the widget text and interaction text are incorrect, it should be "Hard leather" not "Hard Leather", and "Tan All" not "Tan all", the case matters.1 point1 pointloved watching your process, going to use this to learn from! i do feel you could have used the paint brush a little more for the grass and for that reason i give it a 9/10.1 point1 point1 pointhttps://i.imgur.com/7ATuZjC.png and process of creation https://streamable.com/yh2yi1 point1 point1 pointGot one of his free giveaway proxys, connection seems stable and is running nicely.1 point1 point1 pointAs of April 15th 2018: Script works with Willow logs, no bugs that Iv'e seen. Didn't get banned on start, I want a refund, false advertising.1 point1 point1 point1 point1 pointIf the warning goes away before the "Do not show this" box shows up, world hop to make the warning appear again. after 3-4 times it should ask you if you dont want to see it again.1 pointWow. This is very impressive.1 point1 point1 pointHad power ups enabled with G maul, script sometimes equips g maul but doesnt special attack. Heres the Log : [INFO][Bot #1][04/13 02:33:42 PM]: [DreamExecutor] Grabbing Power up: Power surge [INFO][Bot #1][04/13 02:33:54 PM]: [DreamExecutor] Grabbing Power up: Power surge [INFO][Bot #1][04/13 02:33:54 PM]: [DreamExecutor] Grabbing Power up: Power surge [INFO][Bot #1][04/13 02:33:54 PM]: [DreamExecutor] Equipping Missing Equipment [INFO][Bot #1][04/13 02:33:54 PM]: [DreamExecutor] Equipping Missing Equipment It seems to think its not grabbed the power surge although it has.1 point1 point


Account
Navigation
Search
Configure browser push notifications
Chrome (Android)
- Tap the lock icon next to the address bar.
- Tap Permissions → Notifications.
- Adjust your preference.
Chrome (Desktop)
- Click the padlock icon in the address bar.
- Select Site settings.
- Find Notifications and adjust your preference.
Safari (iOS 16.4+)
- Ensure the site is installed via Add to Home Screen.
- Open Settings App → Notifications.
- Find your app name and adjust your preference.
Safari (macOS)
- Go to Safari → Preferences.
- Click the Websites tab.
- Select Notifications in the sidebar.
- Find this website and adjust your preference.
Edge (Android)
- Tap the lock icon next to the address bar.
- Tap Permissions.
- Find Notifications and adjust your preference.
Edge (Desktop)
- Click the padlock icon in the address bar.
- Click Permissions for this site.
- Find Notifications and adjust your preference.
Firefox (Android)
- Go to Settings → Site permissions.
- Tap Notifications.
- Find this site in the list and adjust your preference.
Firefox (Desktop)
- Open Firefox Settings.
- Search for Notifications.
- Find this site in the list and adjust your preference.