Search the Community
Showing results for tags 'beginner'.
-
was just wondering if you kind folks would double check my methods below. i have never coded a day in my life before last week, so this was put together with chatGPT along with trial and error. interested to see if you guys have any pointers, or notice anything I have going on here that might be a no-no. i used intelliJ IDEA community version, and right now I created everything under one class, but I think best practice might be to separate out main/mining/crafting classes. I have tested this just for 20 min or so and it seems to work well enough, but I would like to eventually incorporate the following things if the base methods are sound. -simple paint -additional random pauses or other anti-ban methods -GUI so that I can toggle some options upon selecting the script in my osbot selector -figure out how to get custom cursor and logo to work even though I already added them into a resource directory import org.osbot.rs07.api.model.Item; import org.osbot.rs07.api.model.RS2Object; import org.osbot.rs07.script.Script; import org.osbot.rs07.script.ScriptManifest; import org.osbot.rs07.utility.ConditionalSleep; @ScriptManifest(author = "pupupot", info = "Mines Amethyst crystals and crafts dart tips", name = "Amethyst Minecraft", version = 1.2, logo = "") public class AmethystMinecraft extends Script { private final int AMETHYST_X = 3008; private final int[] AMETHYST_Y = {9710, 9711, 9712}; // Y positions of amethyst crystals private final String AMETHYST_CRYSTALS_NAME = "Amethyst crystals"; private final String AMETHYST_NAME = "Amethyst"; private final String CHISEL_NAME = "Chisel"; @Override public void onStart() { log("Script started. Let's get this bag.");} @Override public int onLoop() throws InterruptedException { log("Looking for the purple shit to start mining."); // Check if inventory is full and craft dart tips if needed if (getInventory().isFull() || getEmptySlots() <= 2) { craftDartTips(); return 1000; // Wait for a second before checking again } // Check each Y position for amethyst crystals for (int y : AMETHYST_Y) { RS2Object amethyst = getObjects().closest(obj -> obj != null && obj.getName().equals(AMETHYST_CRYSTALS_NAME) && obj.getX() == AMETHYST_X && obj.getY() == y); if (amethyst != null && amethyst.isVisible()) { log("Found the purple shit at X=" + AMETHYST_X + ", Y=" + y); // Attempt to mine the amethyst if (amethyst.interact("Mine")) { log("Mining amethyst... Getting this money"); // Wait until the amethyst turns into "Empty wall" new ConditionalSleep(240000, 2000) { // 240,000 milliseconds (4 minutes) @Override public boolean condition() throws InterruptedException { return !amethyst.exists() || amethyst.getName().equals("Empty wall"); } }.sleep(); // Check if the amethyst was successfully mined if (!amethyst.exists() || amethyst.getName().equals("Empty wall")) { log("Bag secured at X=" + AMETHYST_X + ", Y=" + y); // Check inventory space and craft dart tips if needed if (getEmptySlots() <= 2) { craftDartTips(); } } else { log("Failed to mine amethyst at X=" + AMETHYST_X + ", Y=" + y); } } else { log("Failed to interact with amethyst at X=" + AMETHYST_X + ", Y=" + y); } // Exit loop once one amethyst is successfully mined break; } } return random(600, 700); // Return a short random delay before the next loop } private int getEmptySlots() { int count = 0; for (Item item : getInventory().getItems()) { if (item == null || item.getId() == -1) { count++; } } return count; } private void craftDartTips() throws InterruptedException { // Check if chisel and amethyst are in inventory if (getInventory().contains(CHISEL_NAME) && getInventory().contains(AMETHYST_NAME)) { log("We got the tools. Let's start the crafting process."); // Use chisel on amethyst if (getInventory().interact("Use", CHISEL_NAME)) { new ConditionalSleep(2000) { @Override public boolean condition() throws InterruptedException { return getInventory().isItemSelected(); } }.sleep(); if (getInventory().interact("Use", AMETHYST_NAME)) { log("Waiting for crafting interface to appear."); // Wait for crafting interface to appear new ConditionalSleep(5000) { @Override public boolean condition() throws InterruptedException { return getWidgets().isVisible(270, 17); // Interface 270, Component 17 is the dart tip selection } }.sleep(); // Select "Make Amethyst dart tip" option (4th option) if (getWidgets().isVisible(270, 17)) { log("Crafting interface visible. Selecting 'Amethyst dart tips' option."); getWidgets().interact(270, 17, "Make"); } else { log("Crafting interface not visible."); } // Wait for crafting to complete new ConditionalSleep(60000) { @Override public boolean condition() throws InterruptedException { return !getInventory().contains(AMETHYST_NAME); } }.sleep(); log("Crafted amethyst dart tips."); } else { log("Failed to use chisel on amethyst."); } } else { log("Failed to select chisel."); } } else { log("Cannot craft amethyst dart tips. Missing required items."); } } @Override public void onExit() { log("Script stopped. Later Nerd."); } }
-
Hope everyone is doing well with their botting! I come to you all, a new botting user... I've botted before RS3 came out with rs2bot. I was a noob then, and an even bigger noob now as i completely reset my progress on OSRS. I have my combat (att40,str30,def40) pretty balanced out. But I need help figuring out what's best to bot with a lot of 1's, or simply what's fun to do! also, id be highly appreciative on what scripts work great for you and such... Thanks for reading, Happy scaping!
-
Hello everyone; I've been helping a few people out on Discord with their scripts and understanding the API and I've come to the conclusion that I'm just going to make my own video series covering everything you need to know to get a script up and running in OSBot. Each episode will be streamed on YouTube, then edited down to only the essential information, uploaded as a video and embedded into this page under its heading. The main topics will be listed below. People comment additional topic ideas at the bottom of this thread or you can PM / Discord me. Legend: Not aired Airing now Aired Topics: Getting setup: Beginner scripting: Intermediate scripting: Advanced scripting: Other: All videos / streams can be viewed on: YouTube
-
Hey It's me again Have a problem with my miner, - tried writing it different from what I'm used to; Tried using private voids and then putting them into onLoop. What can I improve and what is making my script not runnable? public class LSCopperMiner extends Script { private Area miningArea = new Area( 3228, 3145, 3229, 3145); private void walking(){ if (getInventory().isEmptyExcept("Bronze pickaxe","Iron pickaxe","Steel pickaxe", "Mithril pickaxe","Adamant pickaxe","Rune pickaxe" ) && !miningArea.contains(myPosition())){ log("Inventory is empty and miningArea does not contain my position, walking to mining area"); getWalking().webWalk(miningArea); } else if(getInventory().isFull() && !Banks.LUMBRIDGE_UPPER.contains(myPosition())) { log("Inventory is full, walking to LBank"); getWalking().webWalk(Banks.LUMBRIDGE_UPPER); } } private RS2Object copperRocks = getObjects().closest(7484,7453); private void levelUpWhile() { while (getDialogues().isPendingContinuation()){ if(getDialogues().clickContinue()){ log("Interacting with copperRocks again"); copperRocks.interact("Mine"); } } } private void mining() throws InterruptedException { if(copperRocks != null && !myPlayer().isAnimating() && !myPlayer().isMoving()){ log("Interacting with copperRocks"); copperRocks.interact("Mine"); log("Sleeping a bit before 'going afk'"); sleep(random(1000,1400)); log("Moving mouse outside of screen,'going afk'"); getMouse().moveOutsideScreen(); } } private void banking() throws InterruptedException { RS2Object bankBooth = getObjects().closest("Bank booth"); if(!getBank().isOpen() && bankBooth != null && Banks.LUMBRIDGE_UPPER.contains(myPosition())) { log("In LBank and Bank is not open, interacting with Bank"); bankBooth.interact("Bank"); log("Sleeping for 1.5-2.5 sec to avoid interacting with bank again"); sleep(random(1500, 2500)); } if(getBank().isOpen()) { log("Bank is open, depositing everything except pickaxes"); getBank().depositAllExcept("Bronze pickaxe","Iron pickaxe","Steel pickaxe", "Mithril pickaxe","Adamant pickaxe","Rune pickaxe"); } } @Override public int onLoop() throws InterruptedException { if(!miningArea.contains(myPosition()) || !Banks.LUMBRIDGE_UPPER.contains(myPosition())) { walking(); } else if(miningArea.contains(myPosition())){ levelUpWhile(); mining(); banking(); } return 1000; } }
-
Hey Started learning how to script a few days ago, and I am now in need of some help I know how to display for how long the script has been running / and how many levels I have gained. How would I go about counting, logging and displaying f.ex amount of logs chopped since I started the script? - what code could I use? Thanks
- 4 replies
-
- beginner
- scripting help
-
(and 2 more)
Tagged with:
-
Hey guys, I've been botting for some time now and finally decided to learn how to write my own. My problem is OSbot doesn't appear as a folder that I can export to, let alone exporting to the scripts folder. The guide I'm following is linked and the specific step I'm stuck on is compiling the script. -Thanks!
- 1 reply
-
- help
- windows 10
-
(and 1 more)
Tagged with:
-
My friends found a sick way to make money buying stuff from an npc shop, now it's been some time since i last coded something and i'm looking someone to tell me am i missing some events here. > If inventory is !full, go to npc and trade. > Buys till the stock is empty or inventory is full and banks > If stock is empty == hop Thanks!
- 5 replies
-
- Beginner
- Intermediate
-
(and 1 more)
Tagged with:
-
boolean examined = false; List<RS2Object> allEntities = new ArrayList<RS2Object>(); allEntities = objects.getAll(); do { RS2Object obj = allEntities.get(random(0, allEntities.size() - 1)); if (obj != null && obj.hasAction("Examine")) { obj.interact("Examine"); examined = true; log(obj.getName() + " examined."); } } while (!examined); I am trying to get a list of all the entities around me and examine one at random. I seem to be able to get a random object just fine, but it never actually gets past this part. if (obj != null && obj.hasAction("Examine")) { Any ideas why?
- 1 reply
-
- Beginner
- Intermediate
-
(and 1 more)
Tagged with:
-
Title pretty much says it all. Character needs to sleep, when combining items. Character doesn't do an animation. Some sort of inventory listener?
- 8 replies
-
- Beginner
- Intermediate
-
(and 1 more)
Tagged with:
-
I was looking over Pandemic's guide on a simple mining script http://osbot.org/forum/topic/29924-pandemics-scripting-series-part-ii-path-walking-and-simple-banking-updated-for-osbot-2/?hl=banking And it was all making sense to me except when it had finally come together I had some errors, import org.osbot.rs07.utility.Area; This line was couldn't be resolved, this ended up effecting any othertime when the word Area was used. The guide was written in 2014 and OSBot has been updated since then, I'm not sure how to use the Area function. Thanks for any help you can provide!
- 6 replies
-
- Beginner
- Intermediate
-
(and 1 more)
Tagged with:
-
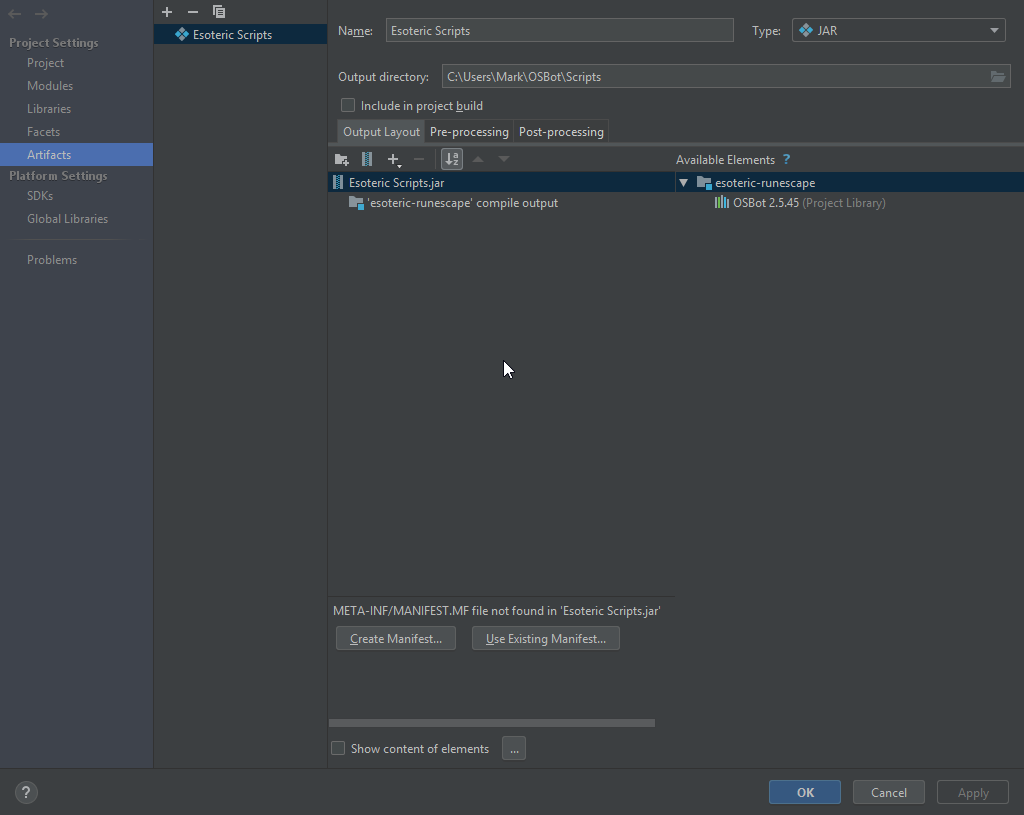
Getting back into coding, and it's been a long time :p lol Short story short, I want to test out my script, but I need it in a .jar How do I build the script to a .jar file through IntelliJ . I know there is a way, did it in the past. Any help is awesome
- 4 replies
-
- Beginner
- Intermediate
-
(and 1 more)
Tagged with:
-
So this is going to be a beginners guide into utilizing a walking function. This is by all means a standard walker and doesn't support any objects blocking path, different types of objects could be in your way so for sake of simplicity i'll leave it out and if you'd like just request me to do a snippet on walking with object interacts, etc.. Suggest me any script and I can probably do it (still learning some small stuff, but majority is pretty ez pz). Firstly, i'd like you to just read the bullet points below, then read the code and understand the functions, and not get overwhelmed by something that you may not understand at first okay; take your time to understand the functions and ways around the OSB API. If you have any questions feel free to PM me or post on my profile wall, etc.. always willing to help with my current knowledge. For coordinations I just use: https://explv.github.io/ (source code Javascript: https://github.com/Explv/Explv.github.io) credits: Explv Position (this is our destination in where we're trying to head towards automatically for us instead of that long grind in walking. Includes a script run time length Supports the Run function for the player (set Run on startup, also comes with a random chance for run checking) Dismisses the pesky random events that pop up sometimes, also stores an integer value that increments every time we dismiss one For sake of a anti ban like method moving our Mouse to -1,-1 coordinates will make it look like a human like AFK (TODO: Test) If the player is under attack, the player will activate Run mode and will continue to run to destination regardless Standard String drawing for paint (displays any info we collect through variables(example: run time, events dismissed)) package main.script.Bot_Walker; import java.awt.BasicStroke; import java.awt.Color; import java.awt.Font; import java.awt.Graphics; import java.awt.Graphics2D; import java.awt.Point; import java.awt.RenderingHints; import java.text.NumberFormat; import org.osbot.rs07.api.map.Position; import org.osbot.rs07.api.model.NPC; import org.osbot.rs07.script.Script; public class AutoWalker extends Script { private long timeStarting = System.currentTimeMillis(); private int randomsDismissed; private Position destination = new Position(3222, 3222, 0); @[member=Override] public void onStart() throws InterruptedException { log("Starting up the bot walking"); timeStarting = System.currentTimeMillis(); getSettings().setRunning(true); } private boolean dismissRandom() { for (NPC randomEvent : npcs.getAll()) { if (randomEvent == null || randomEvent.getInteracting() == null || randomEvent.getInteracting() != myPlayer()) { continue; } if (randomEvent.hasAction("Dismiss")) { randomEvent.interact("Dismiss"); randomsDismissed++; return true; } } return false; } @[member=Override] public int onLoop() throws InterruptedException { int randomRun = random(5); if (randomRun == 1) { getSettings().setRunning(getSettings().getRunEnergy() < 25 ? false : true); } if (dismissRandom()) { while (myPlayer().isMoving()) { sleep(random(600, 800)); } } while (myPlayer().isAnimating()) { mouse.move(-1, -1); } if (myPlayer().isUnderAttack()) { getSettings().setRunning(true); getWalking().webWalk(destination); } getWalking().webWalk(destination); return random(200, 300); } @[member=Override] public void onPaint(Graphics2D graphics) { drawMouse(graphics); Font font = new Font("TimesRoman", Font.PLAIN, 12); graphics.setFont(font); graphics.setColor(Color.WHITE); graphics.drawString("Auto Walker script created by: Booleans Yay", 140, 325); graphics.drawString("Randoms Dismissed: " + formatIntegers(randomsDismissed), 5, 55); long runTime = System.currentTimeMillis() - timeStarting; graphics.drawString("Script Runtime: " + formatTime(runTime), 5, 85); } private void drawMouse(Graphics graphics) { ((Graphics2D) graphics).setRenderingHints( new RenderingHints(RenderingHints.KEY_ANTIALIASING, RenderingHints.VALUE_ANTIALIAS_ON)); Point pointer = mouse.getPosition(); Graphics2D spinG = (Graphics2D) graphics.create(); Graphics2D spinGRev = (Graphics2D) graphics.create(); spinG.setColor(new Color(255, 255, 255)); spinGRev.setColor(Color.cyan); spinG.rotate(System.currentTimeMillis() % 2000d / 2000d * (360d) * 2 * Math.PI / 180.0, pointer.x, pointer.y); spinGRev.rotate(System.currentTimeMillis() % 2000d / 2000d * (-360d) * 2 * Math.PI / 180.0, pointer.x, pointer.y); final int outerSize = 20; final int innerSize = 12; spinG.setStroke(new BasicStroke(1.0f, BasicStroke.CAP_ROUND, BasicStroke.JOIN_ROUND)); spinGRev.setStroke(new BasicStroke(1.0f, BasicStroke.CAP_ROUND, BasicStroke.JOIN_ROUND)); spinG.drawArc(pointer.x - (outerSize / 2), pointer.y - (outerSize / 2), outerSize, outerSize, 100, 75); spinG.drawArc(pointer.x - (outerSize / 2), pointer.y - (outerSize / 2), outerSize, outerSize, -100, 75); spinGRev.drawArc(pointer.x - (innerSize / 2), pointer.y - (innerSize / 2), innerSize, innerSize, 100, 75); spinGRev.drawArc(pointer.x - (innerSize / 2), pointer.y - (innerSize / 2), innerSize, innerSize, -100, 75); } public static String formatIntegers(int number) { return NumberFormat.getInstance().format(number); } public final String formatTime(final long milisecond) { long s = milisecond / 1000, m = s / 60, h = m / 60, d = h / 24; s %= 60; m %= 60; h %= 24; return d > 0 ? String.format("%02d:%02d:%02d:%02d", d, h, m, s) : h > 0 ? String.format("%02d:%02d:%02d", h, m, s) : String.format("%02d:%02d", m, s); } }
- 2 replies
-
- Beginner
- Intermediate
-
(and 1 more)
Tagged with:
-
So hey OSBot, even though I'll probably get called a leecher like I was in my last thread lol, I'm having another issue. I've finished my cowhide script, and it's pretty efficient. Fills an inventory in about 2 mins (~100k/hr profit), but I want to record how many of the hides I've actually picked up. My paint includes the time ran, but I want to know how many hides I've looted in that time. How do I know if I actually picked that hide up, since 1 out of 3 hides my script goes after are looted by other people. Any ideas?
- 12 replies
-
- Beginner
- Intermediate
-
(and 1 more)
Tagged with:
-
Hey OSBot, I'm writing my first script currently. I've figured out walking, areas, and (some) entity interaction, but I'm not super sure on how to pick up a ground item. What I want is for onLoop() to check region if a ground item with name/id exists (isValid?) and simply "Take" it. I can't even figure out how to iterate through the List<GroundItems> or if that's how to do it in the first place. Not very good at reading javadocs lol. Thanks in the future, OSBot.
- 8 replies
-
- Beginner
- Intermediate
-
(and 1 more)
Tagged with:
-
It's a basic short and simple system. I'm learning the API so please if you have any additional ideas and things to add or guides or anything I can use to better myself and my scripts please PM me or reply here!! Script Features: Camera Movement Picks up full inventory of Bones to bury Hoping to add more! Jar: https://mega.nz/#!1R11TTjJ!WkjkMtG6EU-c-k0StJGnVVLgA4nIUiGP1xP4tTJwBnM Raw: https://paste.ee/p/2ZRLP package main.script; import java.awt.Graphics2D; import org.osbot.rs07.api.model.GroundItem; import org.osbot.rs07.api.model.Item; import org.osbot.rs07.script.Script; import org.osbot.rs07.script.ScriptManifest; @ScriptManifest(author = "Booleans Yay", info = "Bone burying made ez pz", name = "Bone Bury", version = 1, logo = "") public class BoneBury extends Script { @[member='Override'] public void onStart(){} private enum BotState { PICKUP, BURY }; private BotState getState() { return inventory.isFull() ? BotState.BURY : BotState.PICKUP; } @[member='Override'] public int onLoop() throws InterruptedException { switch (getState()) { case PICKUP: if (!myPlayer().isAnimating()) { GroundItem bone = groundItems.closest("Bones"); if (bone != null) { bone.interact("Take"); Thread.sleep(random(1500)); } } break; case BURY: camera.moveYaw(random(360)); while (!inventory.isEmpty()) { Item bones = inventory.getItem("Bones"); if (bones != null) { bones.interact("Bury"); if (myPlayer().isAnimating()) { bones.interact("Bury"); Thread.sleep(random(200)); } } } break; } return random(200, 300); } @[member='Override'] public void onExit(){} @[member='Override'] public void onPaint(Graphics2D g){} }
- 5 replies
-
- 1
-
- Beginner
- Intermediate
-
(and 1 more)
Tagged with:
-
Yo what do I return in onLoop when i want to stop the script? I tried returning -1 but that just crashed osbot.
- 3 replies
-
- Beginner
- Intermediate
-
(and 1 more)
Tagged with:
-
Updated for OSBot 2's API! Hello again everyone! I hope you enjoyed my first tutorial, and I hope you'll enjoy this on as well. All feedback is appreciated, so feel free to post your thoughts! This tutorial will use some of my methods for simple banking and path walking! We’ll expand upon our script we were working on last time, so you'll need the source. Step I: Converting to a Banking Script Now as we all know, this script isn’t only boring, it will keep trying to click the rocks after we mine them, even if that vein isn’t ready! To remedy this, we’ll be searching for the rocks using object IDs instead of names. Since we’ll be using specific IDs, we have to choose what and where we’ll be mining! For this second tutorial, we’ll make a script that mines tin in the mines south-east of Varrock: Finding Object IDs Finding object IDs in OSBot is very simple, stand near the object you want the ID of, press Settings: Then press Advanced Settings: Then finally press Object Info: This will lag your client a lot, but don’t worry, you can shut it off as soon as you get the IDs. To get the ID, just look for the number near/on the object you’re looking for: Note: Some objects and NPCs in Runescape have deviations of themselves (like tin), so the same object/NPC may have different IDs (make sure to get all the IDs of whatever you’re using). Now that we have tin’s ID, we’ll make a constant in our script: private static final int[] TIN_ID = { 7140, 7141, 7142 }; We’ll put this line right after this: public class BasicMiner extends Script { Now that we have the object ID found and defined, let’s change our original code to use the ID instead of a name, simply by changing this line: RS2Object vein = objects.closest("Rocks”); to this: RS2Object vein = objects.closest(TIN_ID); Step II: Area Based State For this script, we’ll see which state we should be in with the help of OSBot’s Area class, which is defined as Area(int x1, int y1, int x2, int y2). Simply stand on two opposite corners and fill in the x and y. For the areas, put this after our path variable: private static final Area MINE_AREA = new Area(3277, 3358, 3293, 3371); private static final Area BANK_AREA = new Area(3250, 3419, 3257, 3423); Step II: Path Making The first step to path walking, would be path making! We’ll be making a path by enabling the “Player Position” setting (same place we enabled Object Info): Now, I like to open notepad, or some other text editor while finding my path, so do that now. Alright, finding a path to the bank is pretty simple, but can be slightly confusing at first. Start at the tin veins, and add the position you’re current at (this will be used when we reverse the path to walk from the bank back): Then act like you’re walking to the bank, but only press ONCE on the minimap. Let your player walk to that position and stop, then write down your first position to that path. Then keep doing that until you’re in the bank, here’s what I got: 3283, 3363 3290, 3374 3292, 3386 3290, 3374 3291, 3401 3287, 3413 3282, 3427 3270, 3429 3256, 3429 3254, 3421 To turn this path into something we can use in our script, we’ll be using an array (collection of a type of variable). We’ll put this line of code right after where we defined TIN_ID: private Position[] path = { new Position(3283, 3363, 0), new Position(3290, 3374, 0), new Position(3292, 3386, 0), new Position(3290, 3374, 0), new Position(3291, 3401, 0), new Position(3287, 3413, 0), new Position(3282, 3427, 0), new Position(3270, 3429, 0), new Position(3256, 3429, 0), new Position(3254, 3421, 0) }; Yay! We now have a full path from the mines to the bank, which we’ll reverse to go from the bank to the mines (saving us a step)! Step IV: Path Walking Now that we have a path, let’s put it to use! First of all, let’s change our enum by removing the DROP constant, and adding WALK_TO_BANK, BANK, WALK_TO_MINES: private enum State { MINE, WALK_TO_BANK, BANK, WALK_TO_MINE }; Now it’s time to change our getState() function to return what exact state we should be in: private State getState() { if (inventory.isFull() && MINE_AREA.contains(myPlayer())) return State.WALK_TO_BANK; if (!inventory.isFull() && BANK_AREA.contains(myPlayer())) return State.WALK_TO_MINE; if (inventory.isFull() && BANK_AREA.contains(myPlayer())) return State.BANK; return State.MINE; } Now that the script knows what state we should be in, let’s handle the actual path walking, with a pretty simple method to traverse the whole path: private void traversePath(Position[] path, boolean reversed) throws InterruptedException { if (!reversed) { for (int i = 1; i < path.length; i++) if (!walkTile(path[i])) i--; } else { for (int i = path.length-2; i > 0; i--) if (!walkTile(path[i])) i++; } } You can put this method after getState() if you’d like, and the walkTile(path) will be underlined red, because we’re about to make that method too! I’ll explain this method, as it may look confusing: If the path isn’t reversed, we’ll iterate through the path starting at position 1 (note that arrays start at 0, but remember, our 0 is in the mine) until we end in the bank. If the path is reversed, we’ll simply do the opposite! We’ll start at the 2nd to last position (path.length - 2) and continue to decrease through the path until we end up back in the mine! The reason we aren’t using OSBot’s walk() method is because, well, it doesn’t work nicely at all. It tends to continue clicking the position til you’re there, and many other problems can happen. So here’s the walkTile(Position p) method, put this after the traversePath() method: private boolean walkTile(Position p) throws InterruptedException { client.moveMouse(new MinimapTileDestination(bot, p), false); sleep(random(150, 250)); client.pressMouse(); int failsafe = 0; while (failsafe < 10 && myPlayer().getPosition().distance(p) > 2) { sleep(200); failsafe++; if (myPlayer().isMoving()) failsafe = 0; } if (failsafe == 10) return false; return true; } Simply put, we move the mouse to where the tile is on the minimap, then press the mouse button. After that, we’ll sit around and wait until we’re pretty close to the tile we’re walking to. I also implemented a simple failsafe here, just incase we misclicked or something, that will reclick the same position until we're actually near that position. Step V: Preparing for Banking Now let’s actually make the walking states actually walk, by changing our onLoop() to this: @Override public int onLoop() throws InterruptedException { switch (getState()) { case MINE: if (!myPlayer().isAnimating()) { RS2Object vein = objects.closest(TIN_ID); if (vein != null) { if (vein.interact("Mine")) sleep(random(1000, 1500)); } } break; case WALK_TO_BANK: traversePath(path, false); sleep(random(1500, 2500)); break; case WALK_TO_MINE: traversePath(path, true); sleep(random(1500, 2500)); break; } return random(200, 300); } Step VI: Banking Now that we’ve managed to walk to and from the bank, let’s actually do some banking! If we’re in the bank state, that means we’re already in the bank! Now, let’s add this case to our onLoop() function (as seen above), by simply adding this after the last “break;” and before the ‘}’: case BANK: RS2Object bankBooth = objects.closest("Bank booth"); if (bankBooth != null) { if (bankBooth.interact("Bank")) { while (!bank.isOpen()) sleep(250); bank.depositAll(); } } break; This looks for the bank booth, if it isn’t null and if we actually managed to click on it, we’ll wait til it’s open, then deposit everything except our pickaxe, which is hardcoded so you’ll have to change this to whatever pickaxe you’re using. We’ll automatically detect which pickaxe we’re using in the next tutorial. Conclusion If you managed to get through this whole tutorial without error, congratulations! If not, you can find the full source here. I hope you've learned something from this, and if you didn’t, don’t worry! Programming takes time to learn, look this over a few times, I promise you’ll get it! Thanks for viewing my second tutorial, stay tuned for future tutorials!
-
private Position[] path = { new Position(3254, 3421, 0), new Position(3256, 3428, 0), new Position(3264, 3428, 0), new Position(3273, 3428, 0), new Position(3277, 3426, 0), new Position(3281, 3422, 0) }; getWalking().walkPath(path); Explanation: The position array listed above will be defined at the top of your script (with the other variables) and getWalking().walkPath(path) will be defined wherever you want to call it (such as in a method, in your onLoop, etc.). Getting positions: Click on the settings gear icon in the client and scroll over "Entity debugs" and then toggle "Entity hover debug". Hover your mouse over a tile and it will show the position of the tile. The third number in the position constructor is the "Z" coordinate, meaning the current plane which you are on. Order: The position array has a list of positions with the first position being where your character will start walking and the last position being where your character will end walking. Add positions in a manner where once your character reaches one position, it can find the next position on the minimap. Additional: If your character starts in the middle of the path, it will not walk to the beginning, it will resume until it reaches the final position. If for some reason your character gets off the path, the walkPath() method will attempt to get back onto your path.
-
objects.closest("Bank chest").interact("Use"); This method looks for an object called "Bank chest" and attempts to interact with it using "Use". If you attempt to interaction with the "Bank chest" using "Attack", the method will not work because "Bank chest" does not have the action "Attack". npcs.closest("Guard").interact("Attack"); Lets say you are killing guards, as the method shows above. What happens when you kill all the guards and this method is called? You will get an error called a "Null Pointer Exception", meaning that the method was called but it didn't work because the object reference (in this case the Guard) is null (meaning it doesn't exist). Here is how we would solve that problem: NPC guard = npcs.closest("Guard"); if(guard != null){ guard.interact("Attack"); } Here we create the NPC reference called "guard" and we define it using the npcs.closest() method. Now if npcs.closest("Guard") can't find any guards, "guard" will be defined as null. This information is used in the next line where we check if "guard" is null, meaning if no guards exist. If there is at least one guard that exists (not null or != null), we will interact with the guard using "Attack".
-
Using Multiple Classes Complete Guide! Tutorial Written By: @NotoriousPP Introduction: It has been brought to my attention that some script writers do not know how to use multiple class files inside of their project, and in this tutorial I will try to cover everything I can, to help you have a better understanding how this is done correctly. I will be working on an example project for this tutorial, just follow along using your own project, doesn’t matter which type of project, as long as you understand what’s going on. This project will be modeled in a State based framework, as I see this most often used throughout the forum. Another question you may have, why should you use multiple classes, what are the benefits, is there an upside? Speaking from an Organizational aspect, yes! Splitting up classes makes it easier for the writer and to whoever is working on the script, instead of having to search through a wall of text; you can simply find the class in your Project Folder. Things you’ll need: A Computer or Laptop. A IDE (For this tutorial I will be using Itellij) Latest Version of OSBot. A Brain (Might help) Getting your project setup: Create new project, and add OSBot as a library. Your project should now look something like this: Create packages inside of your src folder, this well help better organize your script! After doing this it should look similar to this: The Real Work Begins (Kinda): So now that we have packages in our src, we need to fill them up! So first lets create a Script class inside of our Core package. (Notice the Class name “ExampleScript”, this is following correct Conventions. An incorrect way of naming classes would be “examplescript”, “exampleScript”, “EXAMPLE_SCRIPT”, etc. If you would like to learn more about Conventions, you can go here: Code Conventions for the Java Programming Language) Alright so now we have a basic Skeleton setup, though it does nothing just yet. Well, lets change that! Since for this tutorial we are writing a State based script, first we need to create State Objects! To do this we need to create an Enum, which basically is “a special data type that enables for a variable to be a set of predefined constants.” (docs.oracle.com). I personally like to have a package that stores all my data needed for a script, so I’m going to create a new package “data”. After we have created the package, create a new Enum inside of the “data” package. (If you don’t know how to create an Enum right away, just create a new class file for right now, and I’ll show you what to do next!) (If you were one of the people who did not know how to create an Enum, simply create a new Class, and then replace “class” with “enum”, and your set!) For this Enum were are only really using the name, and not storing any real data here, so all we need to do is add the different States we want in our script! For this example, I will be using Attack, Eat, Loot, Drop, and Bank. REMEMBER! To follow correct Conventions we are going to name the states using all CAPITAL letters. Optional: Adding a toString() method can be used to make your “state” or “status” more presentable, and not YELLING AT YOU when displaying. The method essentially grabs whatever “state” being used, and modifies it to your liking. In the example below, it creates a final String “s”, then replaces all underscores (Not used in example) with a space; the next like I return the String “s”, though I grab the first Char of the string and add it to a substring for the rest of the string and add a toLowercase(), making ATTACK, to Attack. This is especially helpful when using States as a status; this method can be applied to all types of Enums! (Cool trick if you’re a Windows Intellij user! You can type all your states without having to type with caps lock, or holding shift; just type your states, select them, and press “ctrl + shift + u”, and it will capitalize all selected, or turn it to lowercase if already capital) So we have our States, now what do I do? Well we need to get a getState() method ready our Script class. If you don’t already know, this is the method we use to determine which action or “state” should be executed. Then in the onLoop we have a Switch statement that determines which action should be executed. So what do we do now? The some people here make the mistake of continuing using this class for their tasks, actions, and data; just everything really. This is exactly what this tutorials main focus is on; how we can use multiple classes to help organize our project. You Script class should now look something similar to this. So now we get to create our first separate class! You may ask, well how will I be able to use myPlayer(), client.getInventory(), if I’m not inside of the Script class. Well one word really “Constructors”. We are going to need to create a constructor that takes a Script variable which we can use throughout the script, in this case “sI” (Swizzbeat are you happy now? I didn’t use sA this time ) which refers to Script Instance; but first we need to create a new class inside of our “tasks” package (folder), and in the example I will be creating an Attack() class. In this class we create a public Constructor that accepts a Script variables “sI” as discussed before! So now you should have a class that looks like this. Well you’re almost done implementing your first separate class (If this is your first time that is)! In the Attack() class we can now use “sI” for all of the calls we need, so instead of typing myPlayer() like in the Script class, it would be sI.myPlayer() in your extended class. So for example you can do something along the line of this: (Please don’t use this snippit below for real, it’s just a funny example, I don’t want a PM saying this didn’t work…) Alright so I got a separate class, but how the hell do I use this shit? You might be asking. Well in your Script class, since you extended Script, by using “this” is other words a Script variable, so that’s what we will be using to call our class! So in the onLoop, we can now add the new separated class, simply by adding “new Attack(this);”. Yup it was that easy! So it should look similar to what I have below. Just import the class (Most IDEs do it automatically), and call the class using “new Class(this)”: Well if you don’t understand how this all works by now, read through it once more, it will make sense eventually! To add more classes to our project, just use the same logic we used in creating our Attack() class(Or hell you can just copy/paste, and edit a little). The other packages in our “src”, can be used for numerous of different classes, just it’s up to you to fill them, just use them to keep organized! Conculsion: Well if you followed along, and got it working correctly! Congratulations! Separating classes help you so much down the road when working with large project, teammates, and or co-workers! No one wants to read a wall of text, it’s much easier to navigate through folders and get the file you need (Like how an office files paper work, Duh…). I really hope you guys all enjoy reading this, and it helps a few people out with their scripts! If you have any suggestions, and or comments, please leave them below, and I’m more than gladly answer them! Also let me know about any errors that you find! I'm not a expert, just trying to help! Sources used: http://docs.oracle.com/javase/tutorial/java/javaOO/enum.html http://docs.oracle.com/javase/tutorial/java/javaOO/constructors.html http://www.oracle.com/technetwork/java/codeconv-138413.html
- 19 replies
-
- 12
-
- Beginner
- Intermediate
-
(and 1 more)
Tagged with:
-
I put this idea into effect a few months ago, where it slowly died out mainly due to the fact that most of the people who belonged to it have now quit/are MIA. Hopefully this time around it can become bigger (last time on some days I'd wake up to 1k+ messages from the group, just to give people an idea of how big it got) and there can be a place that scripters can go, besides the chat box, to get help with issues their having. I'd like this group to mainly focus on scripting, however it should also be a place where beginners and experienced Java programmers alike can learn a thing or two from their peers. Who knows, maybe some top notch scripting groups will be formed here If you'd like to join please send a message to OSSwizzbeat on Skype saying something along the lines of "please add me to the OSBot scripting chat". Don't take it personally if I don't accept your contact details, as I like to keep my contact list clean. MESSAGES SENT TO ME WITHOUT A REQUEST TO BE ADDED TO THE GROUP WILL BE IGNORED AS I WILL HAVE NO IDEA WHY YOU ARE ADDING ME
- 28 replies
-
- 1
-
- Beginner
- Intermediate
-
(and 1 more)
Tagged with:
-
Updated for OSBot 2's API! Hello future script writers and other OSBot members! This will be my first OSBot script writing tutorial, and it's geared toward beginners with at least some understanding of Java (however, I'll still be covering some fundamentals). So, let us begin. Step I: Getting the IDE An IDE (integrated development environment) is software that makes programming much easier on you, the programmer. There are many Java IDE's to choose from (IntelliJ, NetBeans, Eclipse, and many more), but for this tutorial, we'll be using Eclipse. You can download Eclipse here. Simply choose the Eclipse Standard and download the version for your computer (32 or 64 bit). Once downloaded, use a program to decompress the archive, and move the eclipse folder to wherever you'd like (C:\, your desktop, it honestly doesn't matter). To open Eclipse, go into that folder and open the Eclipse application. Congratulations, your one step closer to making OSBot scripts! Step II: Basic Java Fundamentals Java, like C++, PHP, and Javascript, is a high-level programming language, which simply means it's very readable by humans (we use English while programming in these languages) and therefore much simpler to write code. If you're an absolute beginner, with no background in programming at all, this is going to go by extremely fast, and I will likely skip over some important topics. If you fall into this category, you absolutely NEED to read these tutorials by Oracle. I'm not sure about most of you, but I feel that a great way to learn something is to dive right in, and worry about the little things after you've started to understand the bare essentials. With that in mind, let's take a look at a simple HelloWorld class: public class HelloWorld { public static void main(String[] args) { System.out.println("Hello World, I'm learning Java!"); } } Now looking at that might be intimidating if you're new to this, but believe me it's very simple! I'll break down some of the common words used above: public: This could be public, private, protected, or default. It simply states the visibility of this class/method/variable. Public items can be seen from outside of your package, private items can't be seen by other classes in your package, protected items can only be seen by the subclasses of your package, and default can only be seen by your package. class: A class is like a blueprint from which objects are created (Oracle). static: This is a keyword that simply means that only one instance of it will ever exist, even if you recreate it infinitely. void: This is the return type of this method. Void methods return nothing, int methods return integers, String methods return strings, and so on. String[]: This is an array. Arrays are just containers that hold a specific number of items (of one type). For example, this method takes an array of strings as a parameter. System.out.println: This is just a method that prints a message to the console and then prints the newline character. ;: Semi-colons are used at the end of any Java statement (note: conditionals and loops do not count as statements), without them, your compiler will give you errors. { }: These curly braces are used to surround/contain the contents of a class/method/etc. This is all of the Java basics I will teach, simply because there are already many resources out there (see above). Step III: Setting up a Java Project Setting up a Java project in Eclipse for making OSBot scripts is simple, just follow these steps: Step 1: Press File>New Java Project and name your project, then press finish Step 2: Add the OSBot .JAR file to your build path Step 3: Add a class to your new project And you're ready to actually start script writing! Step IV: Creating Your Script Now here's where we actually start making your script! For this example, we'll be creating a very simple mining script that will mine and drop everything once the inventory is full (please note: this example is hardly usable for a script, but it shows the basics. With a real mining script, you'll want to replace the object name with the ID(s) of the rocks, so you don't try mining empty veins). Here's the full source: import org.osbot.rs07.api.model.RS2Object; import org.osbot.rs07.script.Script; import org.osbot.rs07.script.ScriptManifest; import java.awt.*; @ScriptManifest(author = "You!", info = "I made this script!", name = "Basic Miner", version = 0, logo = "") public class BasicMiner extends Script { private enum State { MINE, DROP }; private State getState() { if (inventory.isFull()) return State.DROP; return State.MINE; } @Override public void onStart() { log("I can't believe script writing is this easy! I love learning!"); } @Override public int onLoop() throws InterruptedException { switch (getState()) { case MINE: if (!myPlayer().isAnimating()) { RS2Object vein = objects.closest("Rocks"); if (vein != null) { vein.interact("Mine"); } } break; case DROP: inventory.dropAll(); break; } return random(200, 300); } @Override public void onExit() { log("Thanks for using this wonderful script!"); } @Override public void onPaint(Graphics2D g) { } } Now most of that will be confusing, but don't worry, I'm here to help you! I'll break this down for you. import org.osbot.rs07.api.model.RS2Object; import org.osbot.rs07.script.Script; import org.osbot.rs07.script.ScriptManifest; import java.awt.*; These lines import other classes for their use in your script. @ScriptManifest(author = "You!", info = "I made this script!", name = "Basic Miner", version = 0, logo = "") This is the script manifest, which simply tells OSBot your script's author, info, name, and current version (for use in their class loader). public class BasicMiner extends Script { ... } This just defines our class, and extends OSBot's Script class, so we can use all of their fancy API methods. private enum State { MINE, DROP }; private State getState() { if (inventory.isFull()) return State.DROP; return State.MINE; } Here we make an enum (collection of constants) called State which holds two states: mine and drop. Then we have a method that's return type is State (so it returns a State, which we just made). If your inventory is full, this method will return the dropping state, otherwise it will return the mining state. @Override public void onStart() { log("I can't believe script writing is this easy! I love learning!"); } This method is part of OSBot's Script class (which we're extending from). The onStart() method is only called once, and is called at the beginning of the script. This is where you should define some variables that only need defined once (the start time, start experience/level, etc.). @Override public int onLoop() throws InterruptedException { switch (getState()) { case MINE: if (!myPlayer().isAnimating()) { RS2Object vein = objects.closest("Rocks"); if (vein != null) { vein.interact("Mine"); } } break; case DROP: inventory.dropAll(); break; } return random(200, 300); } This is another method from OSBot's Script class (see that @Override?). onLoop() returns an integer, or how many milliseconds to wait before doing onLoop() again. We then use a switch statement to see what we should be doing. If we're to mine, we check if our player is currently animating (mining). If we aren't, we find the closest rock to mine, if that doesn't exist (or is null), we stop right there. But if it isn't null, we interact with the rocks by pressing "Mine". If we're to drop, we simply drop everything in your inventory (you did have your pickaxe equipped, right?). @Override public void onExit() { log("Thanks for using this wonderful script!"); } @Override public void onPaint(Graphics2D g) { } onExit() and onPaint(Graphics g) are two more methods from the Script class. onExit() is called once your script is stopped, and onPaint(Graphics g) is called every time the screen is updated. Step V: Exporting Your Script The final step to this tutorial will be exporting the script we just made so we can actually test it out! Step 1. Right click your project and press Export... Step 2: Choose JAR file Step 3: Choose your OSBot's scripts directory and export it! Well that's all for this tutorial, thanks for reading! You can find Part II here! Also: post suggestions for future tutorials, and I'll definitely consider it!
-
Credits to @Divinity for letting me use his enum as an example Example: (I will be using this enum through out the whole tutorial, the variable will be shorten down to make space). public enum ThievingNPC { MAN("Man", 1), FARMER("Farmer", 10), FEMALE("HAM Female", 15), MALE("HAM Male", 20), HAM_GUARD("HAM Guard", 20), WARRIOR("Al-karid Warrior", 25), ROGUE("Rogue", 32), MASTER_FARMER("Master Farmer", 38), GUARD("Guard", 40), PALADIN("Paladin", 70), GNOME("Gnome", 75), HERO("Hero", 80), ELVE("Elve", 90); private String name; private int lvl; ThievingNPC(String name, int lvl){ this.name = name; this.lvl = lvl; } public String getName(){ return name; } public int getLevel(){ return lvl; } } What’s an Enum? An Enum is a data type, just like an interface and class. Enums and Classes consist of some similar characteristics, for example: constructor and some general methods. But the most unique things about Enums would be that they allow you to pre-define constants, which then allow you to access them at any time. What’s a Data Type? So a Data Types would be consider something like: Int, String, Boolean etc.. So what I’m trying to say, is that your allowed to create methods out of an Enum. You’re allowed to use them, like you would in an argument, constructor, and even a method. Example: public void something(Enum name) { } public EnumName somethingElse() { return enumVariable } Parts of an Enum: (in order) Example: //variables //private fields //Enum constructor //setters & getters methods //your own custom methods How to create an Enum: When you want to create an Enum, you will start off with a modifier (optional). Followed by the key word “enum”, then after follows the name of the Enum. Finally end it with brackets “{ }” Example: public enum ThievingNPC { } Enum Conventions: Naming the Enum: You must capitalize the first letter in every word (no spaces ). Example: //The only reason why my enum is called ThievingNPC, and npc is in all caps is because it is an acronym ThievingEnum YouGetItNow Naming Variables: You must capitalize all letters, and you must replace all spaces with underscores (“_”). Example: ROGUE MASTER_FARMER Adding in variable (use Conventions): This is where the fun begins. Now you are allow to add in as many variables as you want. Just know that after every variable you end it with a coma “,”. But at your last variable it must end in a semicolon “;”. Example: MAN(), HAM_GUARD(); More important info about variables: Once you create your variables, if you decide not to add any predefined constants (hence the infomation in between the parenthesis after the variable name), then you dont need to addin the parenthesis. The parenthesis are meant to help organize what information goes with which variable. Example: (this is part of my Magic Manager snippet) "If you dont understand then dont worry this isnt that important". public static enum Rune { STEAM, MIST, MUD, LAVA, SMOKE, DUST, EARTH, FIRE, WATER, AIR, ASTRAL, BLOOD, BODY, CHAOS, COSMIC, DEATH, LAW, MIND, NATURE, SOUL; @Override public String toString() { return super.name().toLowerCase() +" rune"; } } How to create Constructor: Optional adding a modifier. With Enum you’re not allowed to use the “public” keyword modifier. Since Enum variables are static. Use the Enum name followed by Arguments. Your constructor Argument must match the arguments within the variables. and end with brackets “{ }”. Example: MAN("Man", 1), FARMER("Farmer", 10); ThievingNPC(String name, int lvl) { } What to do within the Constructor: You must first create some private fields. Then make your Constructor argument equal those private fields. Example of the key word this: link Example: public enum ThievingNPC { MAN("Man", 1), FARMER("Farmer", 10); private String name; private int lvl; ThievingNPC(String name, int lvl){ this.name = name; this.lvl = lvl; } } Creating Methods: Since your fields are private you need some sort of way to be able to access the values. So this is where you would create your getter methods. Also any other custom method you would need. Example: public enum ThievingNPC{ MAN("Man", 1), FARMER("Farmer", 10); private String name; private int lvl; ThievingNPC(String name, int lvl){ this.name = name; this.lvl = lvl; } //from here and below are where you put your methods at public String getName(){ return name; } public int getLevel(){ return lvl; } } Some Default Enum Methods & Returns: These are some of the default methods that Enum's come with. There's many more, but these are the important ones, and the ones i like to use . *Format: (method name, return type) //comment if any. values(), Returns: an array of your enum variables. //Static valueOf(String s), Returns: an enum variables. //Static compareTo(E o), Returns: the distance between the two enum variable, using there ordinal(). ordinal(), Returns: the index in of the enum variable. name(), Returns: the exact enum variable name. toString(), Returns: the exact enum variable name. // if toString() isnt overrided. toString(), Returns: what ever you told the method to return. // if toString() is overrided. How to access the Enum and there variables (in order): Start with, the Enum name. followed by, the variable name. then, end with the method. Which returns the method. Example: ThievingNPC.MASTER_FARMER.getLevel(); Returns: 38 End of part one, beginner guide. Link to part two: link not yet ready